 Last Sunday I took a quick trip up to Swan Valley. I was a little worried that the rain was gonna cause me problems, but it ended up being perfect. This is an old school house that is right by the highway up to Driggs. It is a really popular for the local photographers so I wanted to get my own version of it. For this photo, I 3 different shots at different exposures. Then I ran it through the HDR process in CS5. I turned it monochromatic, then added a sepia overlay. I gave it a strong vignette, and then finished it off with a scratch texture layer. I was really happy with how good this turned out. I printed an 8X10 of it at Wallymart and it looks perty legit! I have quite a few more shots from the trip, so I'll have to get those up soon.
Tuesday, June 14, 2011
The Old School in Swan Valley
Last Sunday I took a quick trip up to Swan Valley. I was a little worried that the rain was gonna cause me problems, but it ended up being perfect. This is an old school house that is right by the highway up to Driggs. It is a really popular for the local photographers so I wanted to get my own version of it. For this photo, I 3 different shots at different exposures. Then I ran it through the HDR process in CS5. I turned it monochromatic, then added a sepia overlay. I gave it a strong vignette, and then finished it off with a scratch texture layer. I was really happy with how good this turned out. I printed an 8X10 of it at Wallymart and it looks perty legit! I have quite a few more shots from the trip, so I'll have to get those up soon.
Sunday, May 22, 2011
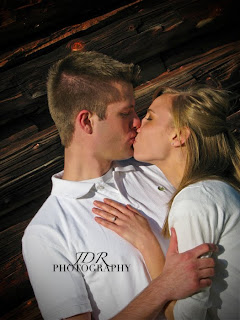
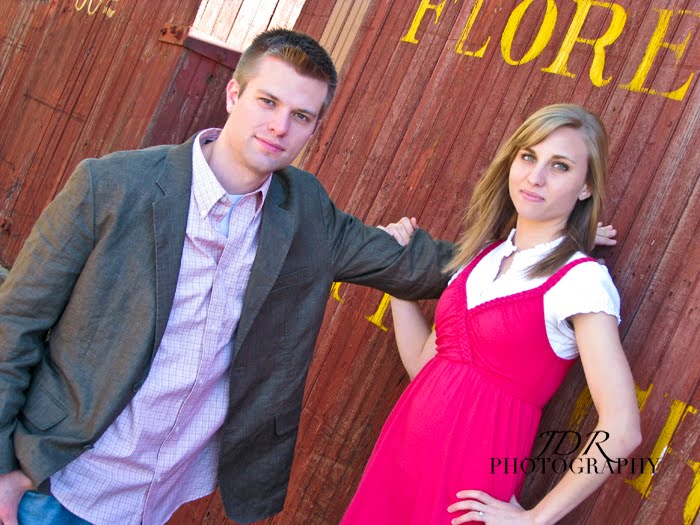
Ty and Karen's Engagements


 We headed up to Montana to take Ty and Karen's engagement photos. We only had to fight the weather for a little bit, but then it cleared up and we had an awesome afternoon. Ty and Karen did great and we were able to get some good shots. Congrats guys!
Tuesday, November 16, 2010
Roomate Photos
These girls asked me to take their roommate photos. It was pretty fun to work with these gals. Thanks chicas!


Thursday, October 21, 2010
Kenzie and Kayla's Senior Photos
These are my two sisters, Kenzie & Kayla. They are seniors this year, so we've been going out and taking photos. These are just the first few photos, so there's more to come!
 Kenzie

 Kenzie
 Kayla
Kayla
 Kayla
Kayla
 Kenzie
 Kayla
Kayla
 Kenzie
 Kenzie
More to come...
 Kenzie
 Kenzie
 Kayla
Kayla Kayla
Kayla Kenzie
 Kayla
Kayla Kenzie
 Kenzie
Sunday, August 22, 2010
Jamie & Spence's Engagements
Spence and Jamie asked me to shoot their engagement photos, and I was a little nervous because I've never done anything that serious before. We took these photos up in Nevada City, which is great place for portraits. After fighting the wind most the afternoon we were finally able to get some great shots of these two. Congrats Spence and Jamie!


Monday, June 21, 2010
Fine Art
 Car Fine Art
Enhancements: I edited this photo using camera RAW. I increased the saturation, clarity, and vibrance to boost the colors. Then I put the photo in the template that I created to display some of my work.
The template was easy to make. I created a new document in Photoshop, then drew a rectangle. I hit Command + T to active the transform tool, then held shift while clicking on the rectangle and dragging over. This created a duplicate of the rectangle. I hit enter to combine the two, then hit Shift + Control + Alt + Command all together 3 times, which created 3 more rectangles. After arranging the 5 rectangles where I wanted, I dragged my photo over to this template, sized it, then holding Option I clicked between the photo layer and the rectangles layer. This stuck the photo behind everything and you could see the photo through the rectangles. Then I just added my signature and my business name.
 Original; May 2, 2010; 7:45 p.m.; Rexburg, ID; f/ 4.0; 1/250; Canon S5 IS
 Barn Fine Art
Enhancements: I used camera RAW to boost the colors in the photo. I didn't do any other edits besides clarity, vibrance, and saturations.
 Original; May 14, 2010; 7:45 p.m.; Ririe, ID; f/ 4.0; 1/250; Canon S5 IS
Sunday, June 13, 2010
Borders
 The Manor; 5:45 p.m.; June 12, 2010; Nevada City, MT; f/ 4.0; 1/320; Canon S5 IS
Enhancements: This started out as a Camera RAW edit, but I didn't really like the colors. So then I turned it to sepia and added the border. For the border I downloaded a brush and using a Quickmask I made a stamp to create the border. I selected the inverse and hit delete. This created the edge effect around the picture. Then I just dressed it up with some text. This turned out a lot better than I imagined.
 Train Car; 7:00 p.m.; June 12, 2010; Nevada City, MT; f/ 3.2; 1/100; Canon S5 IS
Enhancements: To create the border on this photo, I started by enhancing the original photo with Camera RAW. I added the Cutout and Poster Edges filters to create a painted look on the photo. Then I placed the image layer above a blank white layer. I then placed a layer mask on the image layer and filled it with white. Then using a thick heavy brush with the color set to black, I painted back the original even using random uneven strokes. I adjusted the opacity on on different strokes to give it more of a rustic look.

Barber Shop; 5:45 p.m.; June 12, 2010; Nevada City, MT; f/ 4.0; 1/500; Canon S5 IS
Enhancements: I began by adjusting the original image with Camera Raw. Then I created a new blank layer and set the background color to black. Then I used the Rectangular Marquee tool with 50px feathering to draw a box about 1/4 inch from the edge, and then hit delete. While I still had the selection active, created a duplicate layer and added a white stroke. Then I adjusted the opacity on black and white layers so they weren't too overpowering. It created an interesting burned edge.
Enhancements: I began by adjusting the original image with Camera Raw. Then I created a new blank layer and set the background color to black. Then I used the Rectangular Marquee tool with 50px feathering to draw a box about 1/4 inch from the edge, and then hit delete. While I still had the selection active, created a duplicate layer and added a white stroke. Then I adjusted the opacity on black and white layers so they weren't too overpowering. It created an interesting burned edge.
Subscribe to:
Posts (Atom)